Shed Build From Groundwork to Grand Finish
When you picture a backyard shed, you might imagine a small, prefabricated structure meant only for storage. But when it’s built right – with a solid foundation, precise framing, and thoughtful design – a shed becomes more than storage. It becomes an extension of your home.
At North Bay Home Renovations, we specialize in custom sheds, garages, and outdoor structures built to the same standard as a home addition. Every detail matters — from soil preparation and base compaction to framing, sheathing, siding, and finishing.
This blog takes you through the complete step-by-step build of a backyard shed in North Bay, showcasing how our team transforms an empty patch of yard into a fully functional, beautiful structure that stands the test of time.
Phase 1: Planning, Design, and Site Preparation
Every great project starts long before the first board is cut. The planning phase is where we determine the shed’s purpose, layout, location, and structure type. For this North Bay client, the goal was a multi-purpose shed – storage space combined with a small workshop area. The design needed to be durable, weather-resistant, and visually cohesive with the home and yard.
Assessing the Site
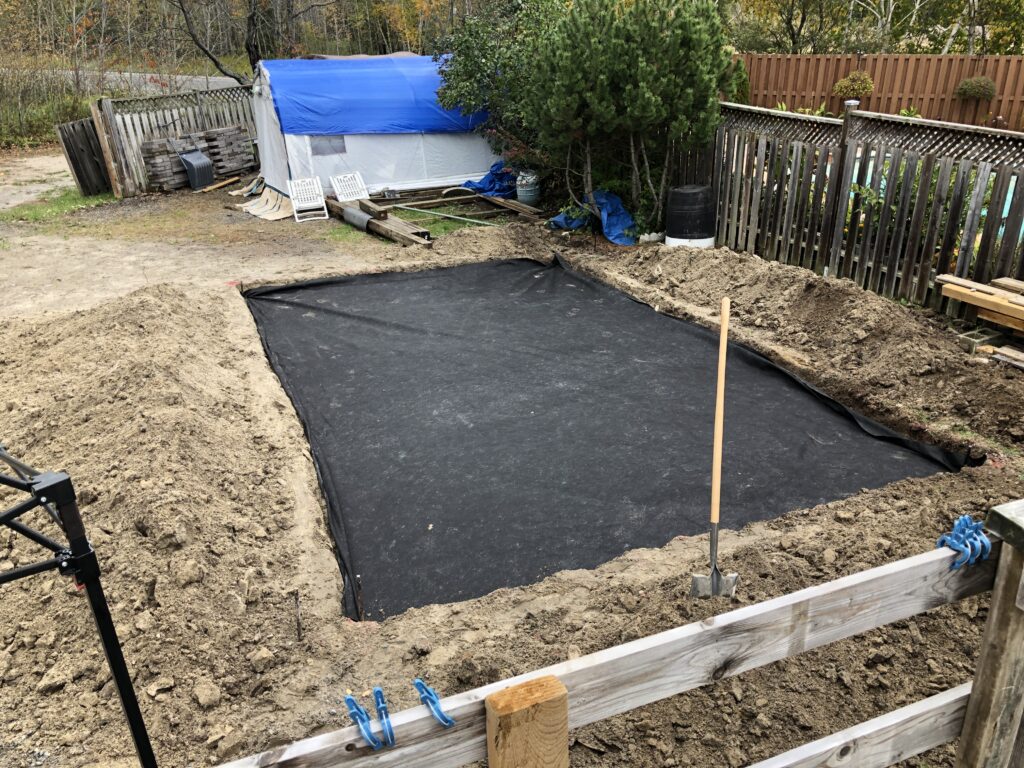
North Bay’s climate demands attention to drainage and soil conditions. The ground was levelled and excavated to a consistent depth to prevent frost heave and future shifting. This ensures the shed foundation remains stable year-round, even through Northern Ontario’s freeze-thaw cycles.
Once excavated, a geotextile fabric was laid down to separate the soil from the gravel base — an essential step that prevents soil migration, improves drainage, and adds long-term durability.
Installing the Base Layer
Next, we added and compacted a layer of ¾-inch crushed stone, providing a firm, drainable base for the structure. Proper compaction is crucial: it prevents settling, uneven floors, and premature wear.
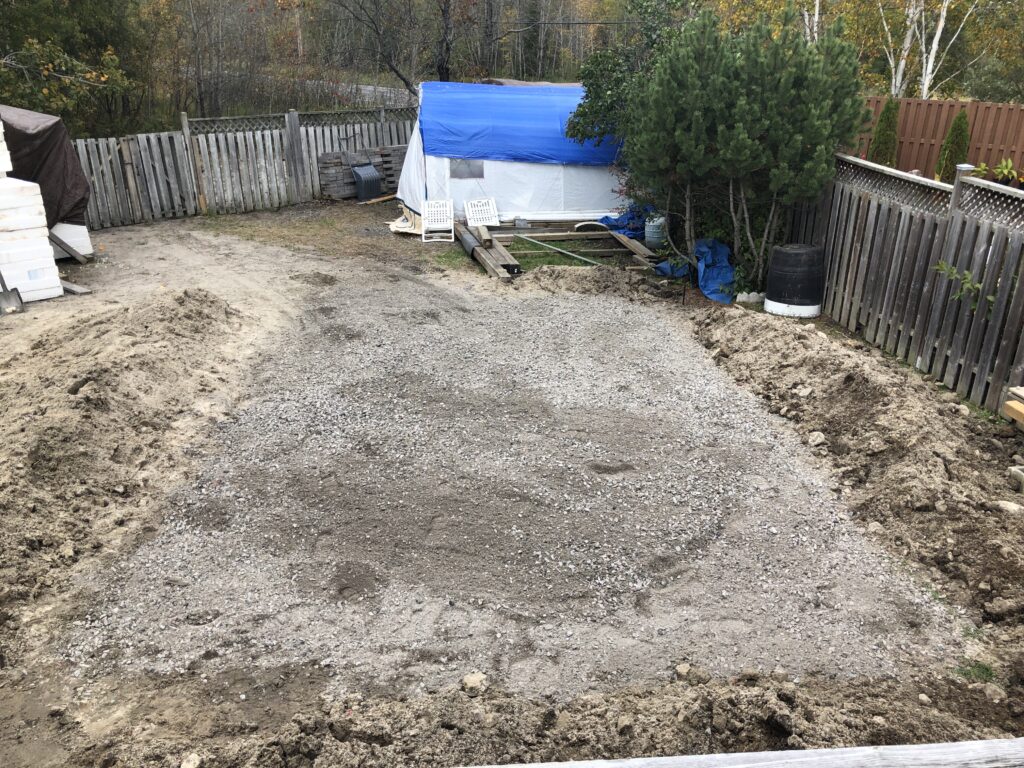
By this stage, the site was fully prepared — level, stable, and ready for framing. Good groundwork isn’t glamorous, but it’s what separates a shed that lasts decades from one that warps, shifts, or rots after a few seasons.
Phase 2: Framing the Foundation
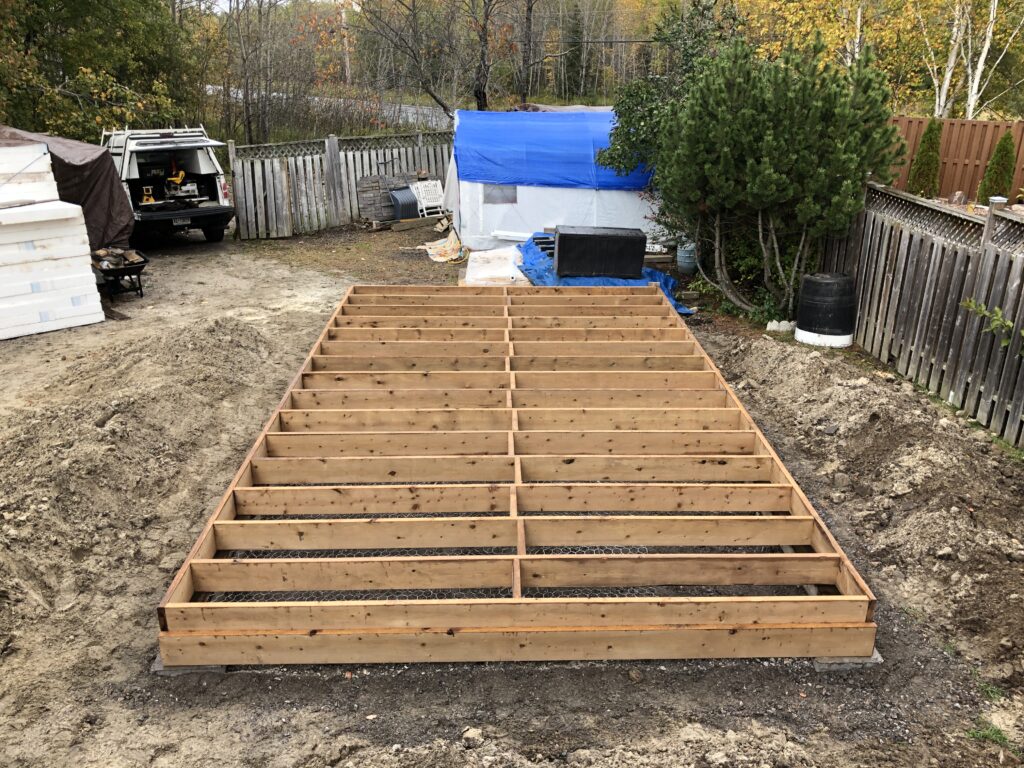
With the base ready, we began framing the floor system using pressure-treated lumber for rot resistance and longevity. The frame was squared and secured on precast concrete blocks to elevate it above ground level — protecting against moisture and promoting air circulation underneath.
Each joist was carefully spaced for optimal load-bearing performance, using a laser level to ensure a dead-flat plane. This attention to alignment pays off when it’s time to install the sheathing and walls — everything fits precisely, without stress or uneven load distribution.
Why Framing Matters
Even a small deviation in the foundation can lead to problems: uneven doors, cracked siding, and stress on the roofline. That’s why we treat every project, no matter the size, like a full-scale home build — complete with checks for level, square, and structural alignment.
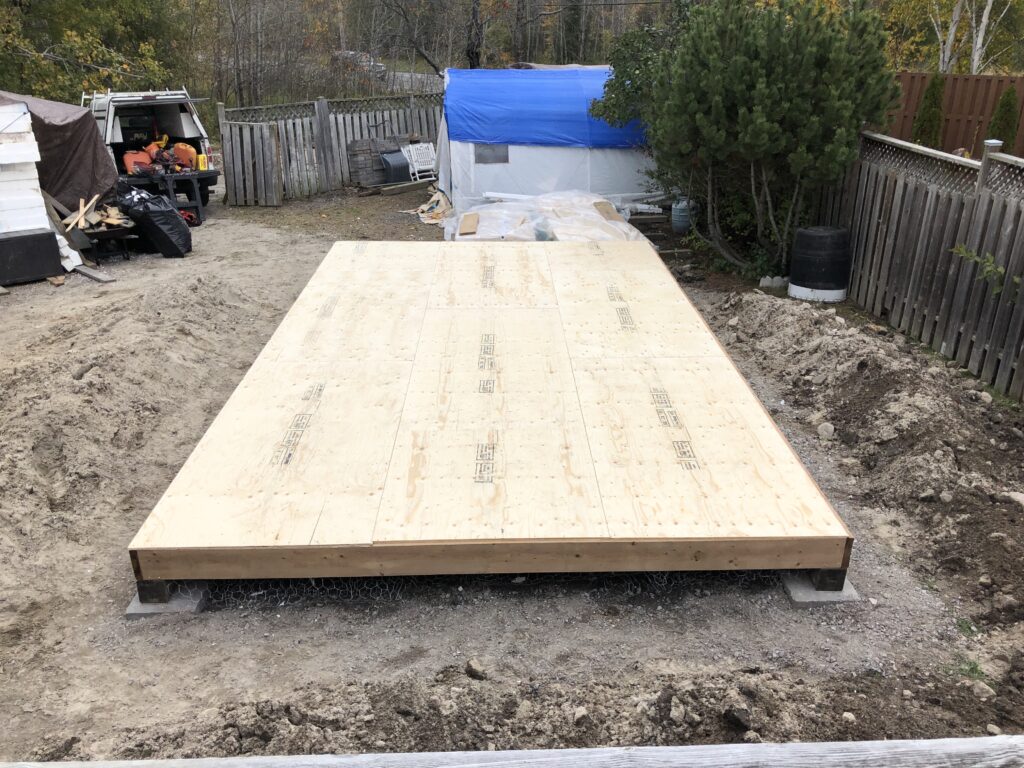
Phase 3: Subfloor Installation

After confirming the frame was perfectly square, we installed rigid foam insulation panels between the joists to improve energy efficiency and create a more comfortable, temperature-stable interior. This insulated layer helps prevent cold transfer from the ground during the winter months – an important step for North Bay’s climate.
Once insulation was in place, we installed exterior-grade plywood sheathing across the entire floor. The panels were glued and fastened securely to prevent squeaks and shifting over time, ensuring a solid and quiet walking surface.
We also installed galvanized mesh beneath the joists to deter rodents and maintain airflow. It’s a small detail that provides big benefits – keeping pests out and protecting the longevity of the shed from below.
By the end of this stage, we had an insulated, solid, flat, and durable base – ready to support the full structure and provide comfort and protection for years to come.
Phase 4: Wall Framing and Sheathing
The wall framing came next, using kiln-dried SPF lumber. The layout followed a standard stud spacing pattern for strength and simplicity. We framed openings for windows and doors, ensuring proper headers and alignment for later installation.
Each wall was lifted and fastened in sequence, with corners reinforced using blocking for rigidity. Once framed, we applied OSB wall sheathing to tie everything together and add shear strength – critical in preventing racking during wind or load shifts.
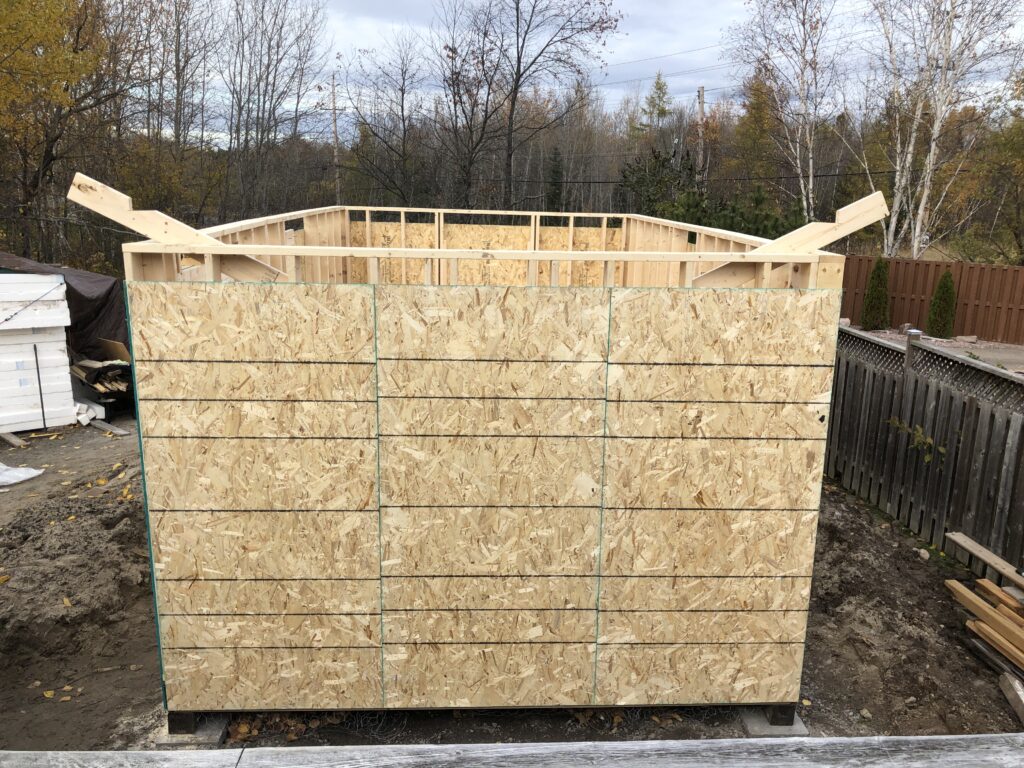
Setting the Roof Structure
We then moved on to framing the roof. The trusses were assembled and installed to create a strong, symmetrical gable roofline. Every truss was checked for pitch consistency and securely fastened to the top plate, ensuring a perfect ridge alignment.
Proper roof framing not only supports the structure but also defines the overall look of the shed – giving it the classic shape and volume that elevate it beyond a standard outbuilding.
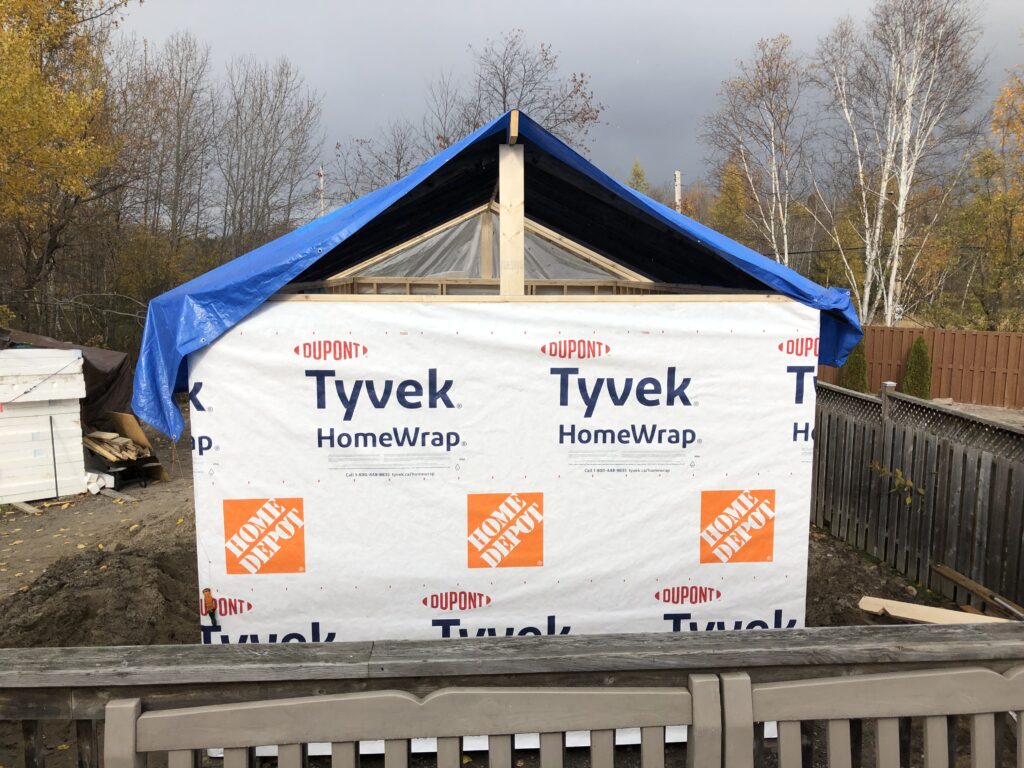
Phase 5: Roof Sheathing and Weatherproofing
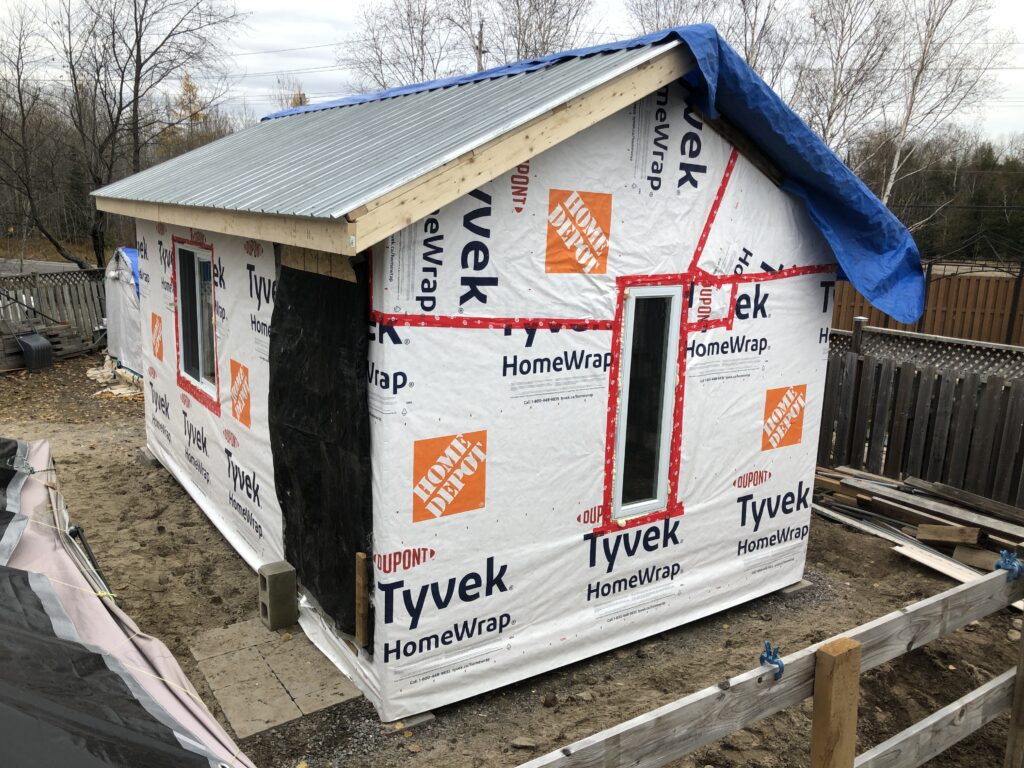
Once the framing was complete, we sheathed the roof with OSB panels, preparing it for the roofing system. Then came the crucial step – wrapping the structure in a full weather barrier using Tyvek HomeWrap.
Tyvek serves as the shed’s first line of defence against moisture and wind. It allows water vapour to escape while preventing rain and snow infiltration. Every seam and opening was sealed with specialized red construction tape, ensuring a continuous, airtight barrier.
This level of detail is what defines our craftsmanship – not just meeting the standard, but exceeding it.
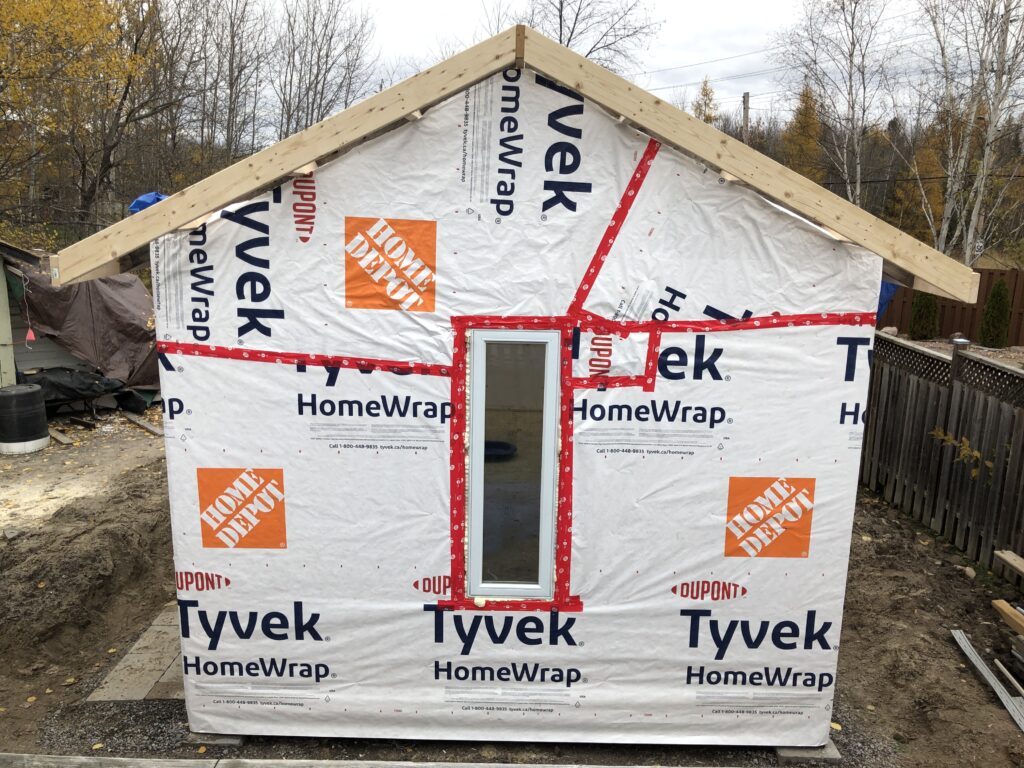
Phase 6: Windows, Doors, and Openings
(Image 9: Door and window installed, Tyvek flashing complete)
We installed an entry door and energy-efficient vinyl windows, complete with proper flashing and sealing. Each window was levelled, shimmed, and sealed to prevent drafts and moisture intrusion.
Attention to window and door installation is essential – it ensures not only functionality but also the longevity of the siding and trim that follow.
At first, the entrance was framed into the left wall (shown below), but during construction, the homeowner requested a design revision to improve layout and flow. The new plan added an entranceway and repositioned the door to the back wall, which you can see in the finished shed.
Phase 7: Siding, Roofing, and Exterior Finishes
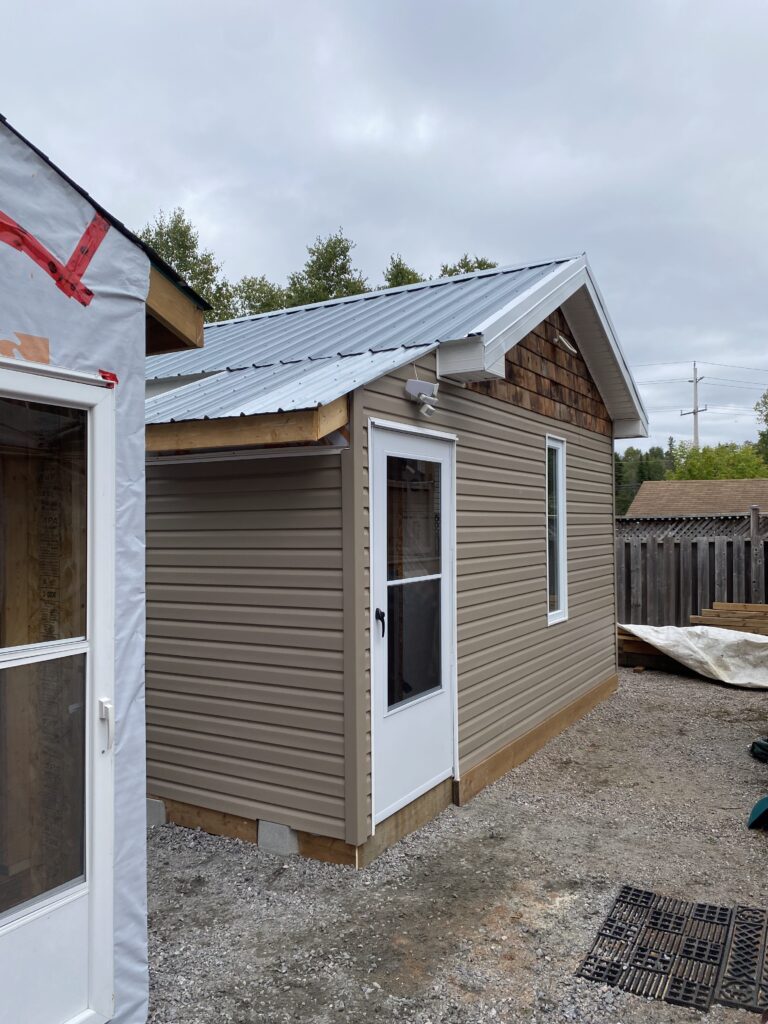
With the structure secure, we moved to exterior finishes – starting with metal roofing. The steel panels were fastened over underlayment for long-term durability and low maintenance. Metal roofs are particularly well-suited for North Bay’s snow and ice conditions, providing excellent runoff and lifespan.
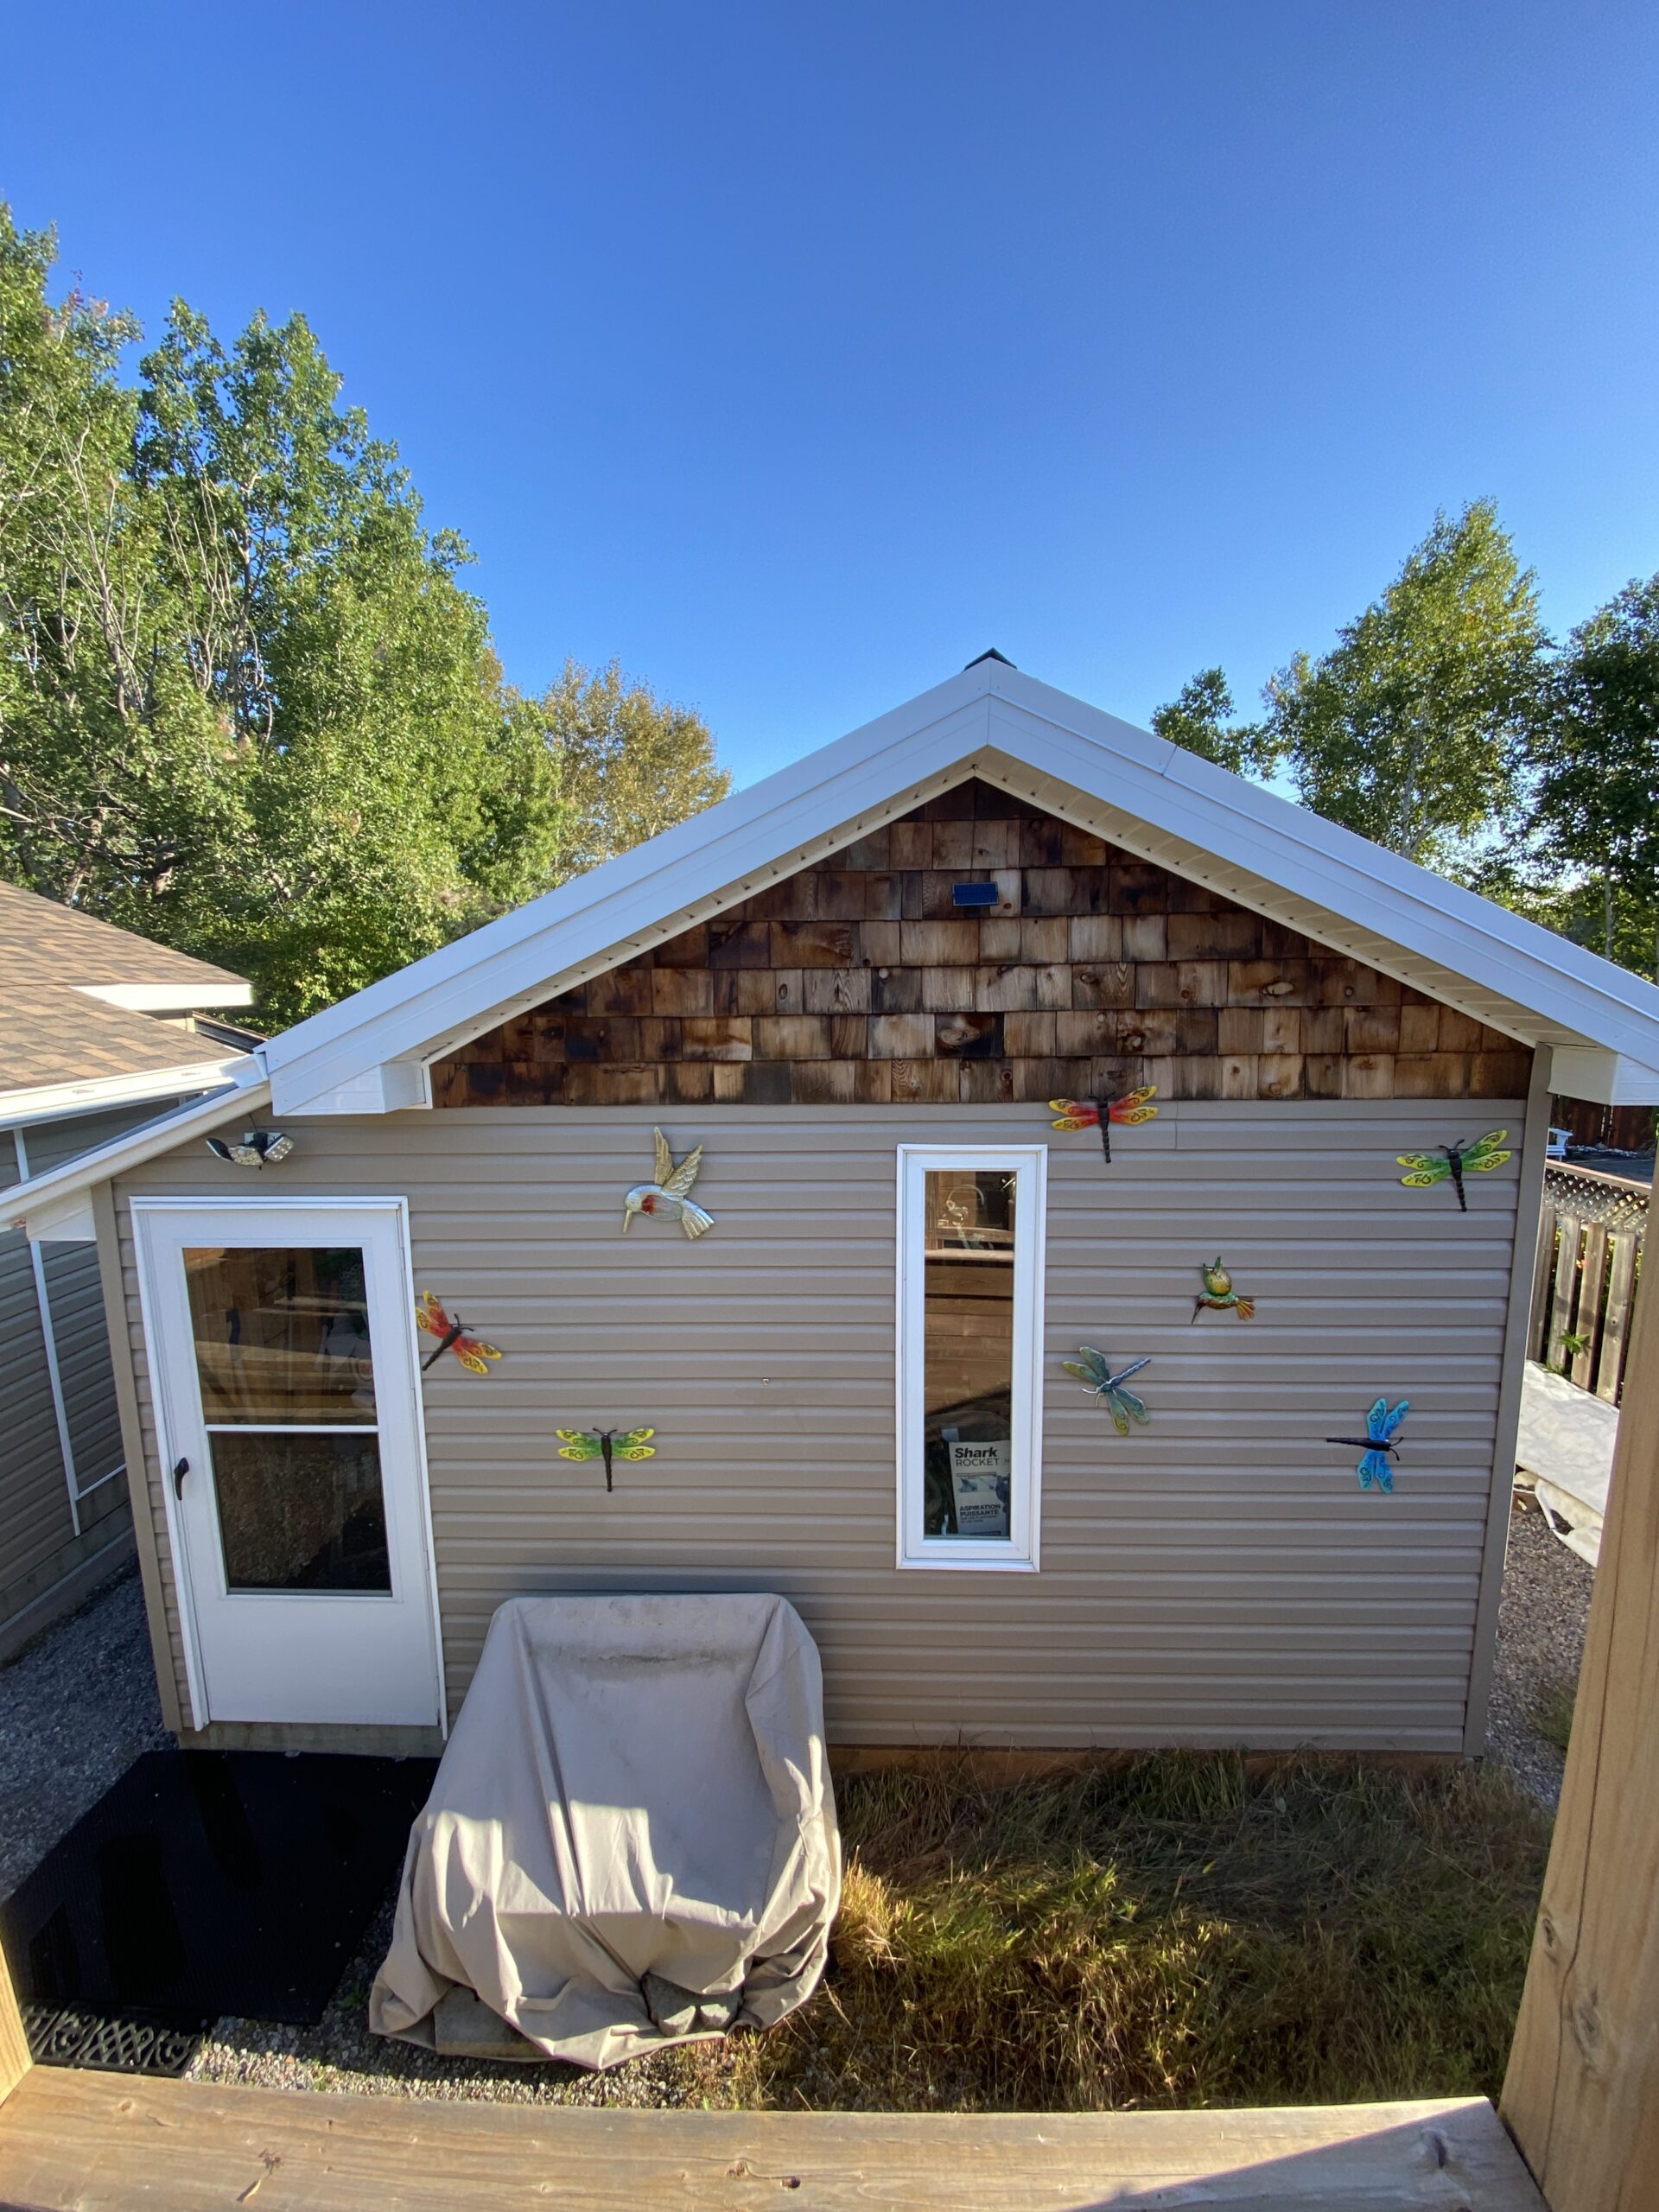
Next came the siding. The main walls were finished with beige vinyl siding, chosen for its durability, weather resistance, and clean appearance. The gable was accented with natural cedar shakes, adding warmth and texture. This combination delivers a timeless cottage-style aesthetic that complements the surrounding property.
Finally, trim boards and soffit were installed, completing the crisp, finished look. The white fascia and window trim contrast beautifully against the siding, creating a polished, professional appearance.
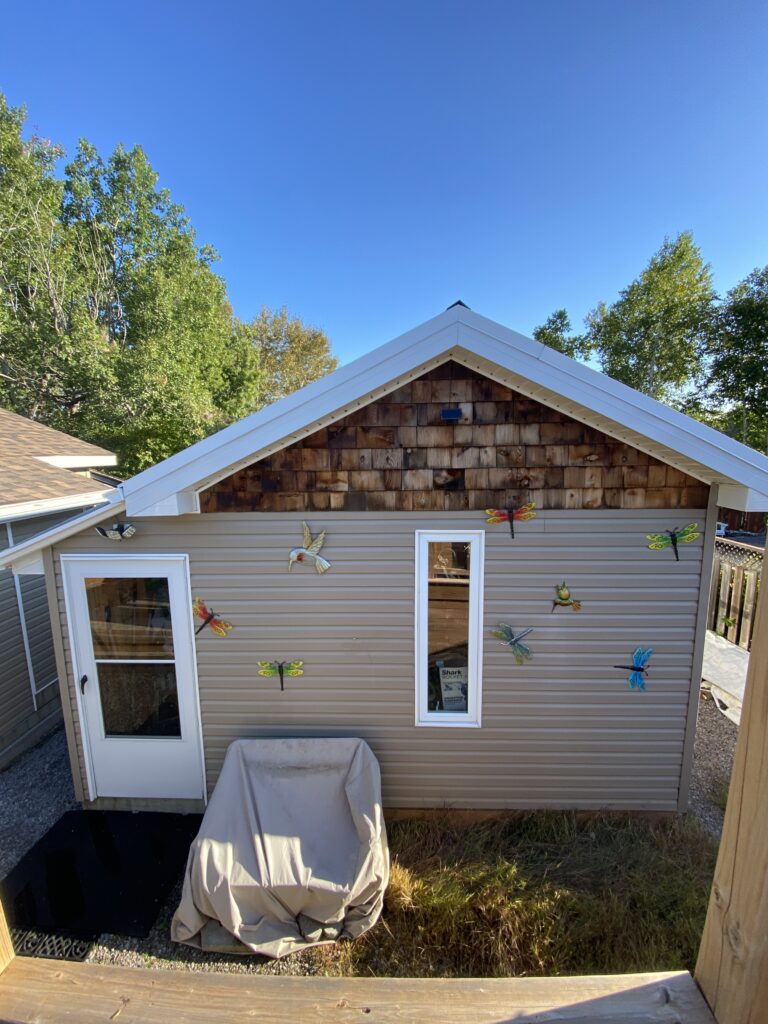
Phase 8: The Final Reveal
The completed shed is more than functional – it’s beautiful. The cedar accent adds charm, while the crisp vinyl siding ensures long-term protection. Decorative touches, like the wall-mounted dragonflies and birds, bring personality and colour to the structure.
This shed now serves as a year-round workspace and storage area, seamlessly integrated into the property. Built to last, this structure showcases our Red Seal–endorsed standard of workmanship from start to finish.
Behind Every Great Shed Build is a Solid Plan
At North Bay Home Renovations, we believe every successful project begins with a detailed plan. We take time to understand our clients’ goals, budget, and site conditions before breaking ground. From there, our process ensures quality at every step:
- Consultation & Design: Custom layout and design options.
- Permitting & Code Compliance: We handle permits, locates, and inspections.
- Foundation Prep: Level, compacted, frost-protected bases.
- Framing & Sheathing: Red Seal carpenters ensure structural precision.
- Envelope & Roofing: Proper moisture control, ventilation, and flashing.
- Finishes: Trim, siding, doors, and aesthetic details that tie everything together.
Custom Shed Options for Every Homeowner
We understand that no two homeowners – or properties – are alike. That’s why we offer fully customized shed designs to match your space, purpose, and budget.
Common Shed Types We Build
- Storage Sheds: Designed for tools, lawn equipment, or seasonal décor.
- Workshops: Fully insulated, wired, and lit for year-round hobby use.
- Garden Sheds: With potting benches, windows, and ventilation for plant care.
- Studio Sheds: Perfect for home offices, art studios, or guest retreats.
- Pool Houses: Finished interiors with waterproof materials and outdoor showers.
Optional Upgrades
- Insulation and vapour barrier for four-season use
- Electrical service and lighting
- Interior shelving and cabinetry
- Steel or asphalt roofing systems
- Skylights or extra windows
- Decorative trim and cedar or composite finishes
Each project is handled start to finish by our licensed and insured team – including design, permits, construction, and cleanup.
Built Right. Built to Last.
At North Bay Home Renovations, our reputation is built on trust and quality. Every project, big or small, follows the same core principles:
- Red Seal–Endorsed Craftsmanship: Proven skill and precision on every cut and joint.
- WSIB Registered & Fully Insured: Protecting you and your investment.
- Transparent Quotes: Line-item estimates with no hidden costs.
- 2-Year Labour Warranty: We stand behind every build.
- Home Depot PRO & Chamber of Commerce Member: Local reliability and professional accountability.
We take pride in our work because our clients trust us to deliver more than a structure – they trust us to deliver peace of mind.
Designed for North Bay Conditions
From summer humidity to heavy snowfalls, our shed builds are engineered for Northern Ontario’s unique climate. We incorporate best practices for ventilation, water management, and load-bearing design:
- Helical piles or concrete blocks to prevent frost heave.
- Proper slope and drainage to move water away from the foundation.
- Weather barriers (Tyvek) to prevent wind-driven rain and air leaks.
- Steel roofing systems that shed snow efficiently.
- Quality siding and trim materials that withstand temperature extremes.
This attention to detail ensures your shed won’t just survive North Bay’s weather – it will thrive through it.
Progress Gallery Highlights
- Ground Prep: Excavation, levelling, and geotextile installation.
- Base Layer: Crushed stone compacted for stability.
- Framing: Pressure-treated joists and beams on precast blocks.
- Sheathing: Solid plywood flooring for strength and rigidity.
- Walls: Framing and OSB sheathing for structural support.
- Roofing: Trusses, metal panels, and Tyvek wrap.
- Openings: Door and window installation with proper flashing.
- Exterior: Vinyl siding, cedar accent, and finishing touches.
- Completion: Painted trim, decorative art, and final landscaping.
Each stage reflects a commitment to craftsmanship and care that defines our work across all North Bay home renovation projects.
Why Homeowners in North Bay Choose Us
When you invest in a structure built by North Bay Home Renovations, you’re investing in:
- A team that treats your property with respect
- A process that’s transparent, timely, and professional
- Workmanship that meets or exceeds Ontario Building Code standards
- A product that enhances your property value and daily life
We don’t just build structures – we build trust, one project at a time.
Thinking About a Shed or Outdoor Structure?
Whether you need storage, a workshop, or a creative retreat, a custom-built shed adds function and value to your property. With North Bay Home Renovations, you can expect:
- Honest advice and clear communication
- Permit-ready drawings and compliant construction
- Long-lasting materials and finishes
- Friendly, professional service from start to finish
Ready to Start Your Shed Project?
Your shed should be as strong and dependable as the team that builds it.
Let’s bring your vision to life with a structure that’s Built Right. Built to Last.
Contact North Bay Home Renovations today to request your free quote or call 249-506-0557 and start planning your next backyard build.